


Keyboard Key Remover: How to Clean a Mechanical Keyboard
Clean Your Mechanical Keyboard Safely and Efficiently Using a Keyboard Key Remover
Believe it or not, your mechanical keyboard also needs a proper maintenance routine like your car and other appliances. And an essential component of a mechanical keyboard maintenance routine is the Keyboard Key Remover. Because you cannot proceed with your regular keyboard cleaning routine without a handy tool to remove your keys.
A keyboard key remover is a nifty little tool that can become the best friend of people who want to keep their keyboards clean. Even if someone is just getting into the idea of developing a keyboard cleaning ritual, the first thing that they may consider getting is a keyboard key removing tool.
You May Also Read: Mechanical Keyboard: Tips on Buying Your First Keyboard
Is Your Keyboard A Mechanical Keyboard?
If you are talking about your laptop’s keyboard, then that probably (or for sure) is not a mechanical keyboard.
Mechanical keyboards are the ones that have mechanical switches beneath each key. They are heavier, sturdier, and more durable than a regular rubber dome keyboard aka your laptop keyboard.
These mechanical keyboards were a thing in the past. But like not everything from the past stays in the past, mechanical keyboards, after witnessing a slight decline in their popularity by the introduction of rubber-dome keyboards, experienced a resurrection courtesy of hard-core keyboard fanatics. These people include the pro-gamers, typists, and other people who were accustomed to the mechanical keyboard’s type-feel and other features.
How Does a Keyboard Key Remover Fit-In?
A keyboard key remover or a keycap puller fits into the picture because it plays kind of an important role in helping the mechanical keyboard keep up its efficiency.
Mechanical keyboards specifically and all keyboards generally must have a regular maintenance routine. In the case of mechanical keyboards, the first step of cleaning might be removing its keys. A keyboard key remover makes its entry here and helps you remove the keys safely and easily.
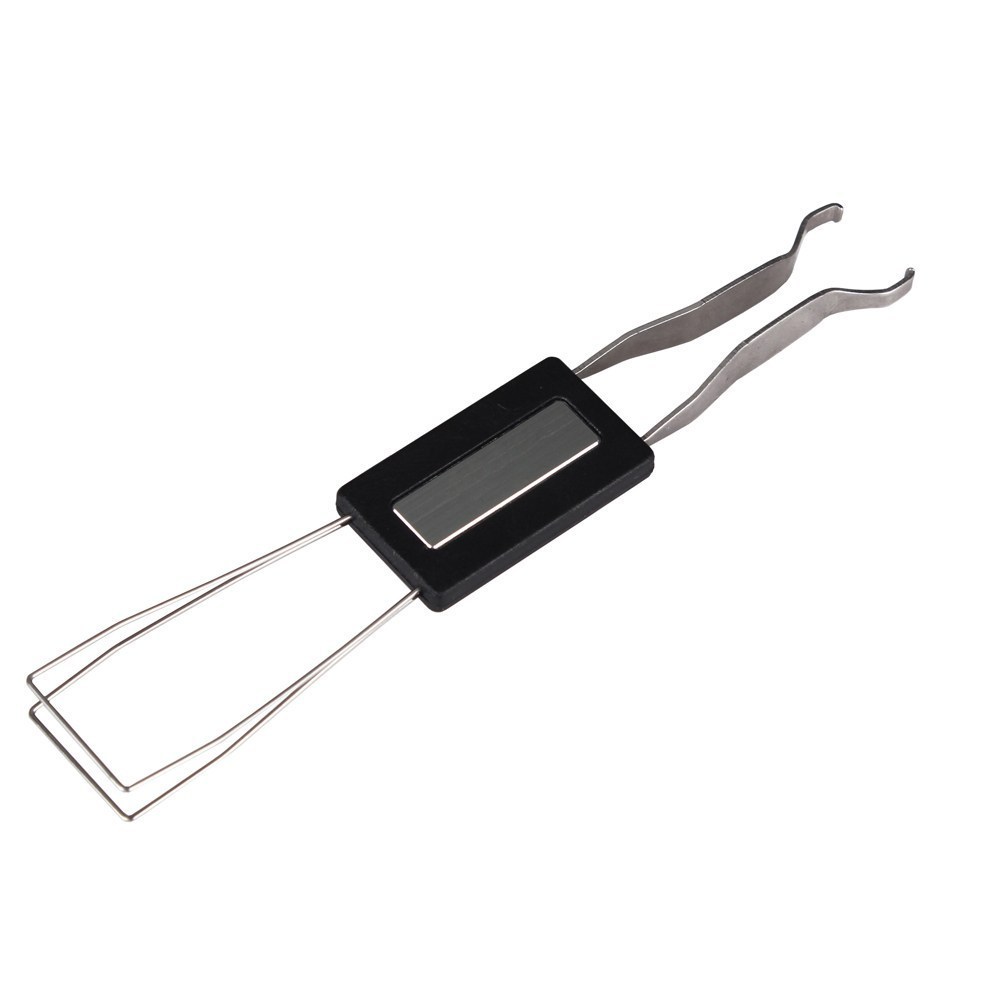
Normally, two types of keyboard key removers are available in the market: a plastic and a metallic keycap puller. While the plastic one is easier to use, the metallic can removes multiple keys easily.
Why Do I Need to Clean My Mechanical Keyboard?
Ah, the million-dollar question. Why do you need to clean your mechanical keyboard when it appears perfectly fine? The answer will shock you.
According to research, a keyboard may have 20,000 times more bacteria than a toilet seat. Shocking, right? But it is true. A keyboard is bound to harbour many bacteria because you and often many other people touch it all the time.
Hence, one of the biggest reasons to clean your keyboard is to rid your keyboard of the bacteria that are more than capable of making you fall sick.
Especially amid a pandemic, it is best that you pay special attention to cleaning and disinfecting your keyboard to keep yourself, your family, and society safe.
Moreover, lack of maintenance leads to the accumulation of dirt, grime, food particles, and miscellaneous other stuff inside your keyboard. This is not only gross, but it may also cast a shadow on your keyboard’s performance by deferring its efficiency.
Why is a keycap puller important when you need to clean a mechanical keyboard?
One of the first steps in cleaning a mechanical keyboard is removing its keys. A keyboard key remover is important for the cleaning process of a keyboard because it helps you remove the keys quickly.
By using a metallic keyboard key remover, you can remove multiple keys from your keyboard in one go. Which significantly speeds up the process of key removal and helps you proceed on to the next step of keyboard cleaning quickly.
Moreover, unlike other household things like a flat head screwdriver or a butter knife, a keyboard key remover can remove your keyboard keys without inflicting any damage to their switches or their legends.
How to Clean Your Mechanical Keyboard Using a Keyboard Key Remover?
Now, we have an idea about mechanical keyboards, keyboard key removers, and their importance in cleaning the keyboard. Therefore, let’s dive right into the process of cleaning your keyboard with the help of a keycap puller.
The Key Removal Using Keyboard Key Remover:
- Nobody likes to get electrocuted. Therefore, the first step in cleaning any electronic appliance is unplugging it. So, before you start pulling those keys out with a key remover, make sure you have unplugged your keyboard from its port.
- Next, make a mental image or a paper map of where your keys are placed on the keyboard; this will help you in replacing the keys.
- Now, place the keyboard key remover on the key (or keys) that you wish to remove and push it down until it firmly fixes underneath the key(s).
- Once you are sure that the keyboard key remover is firmly in place, pull it lightly, and the key(s) will pop right out of the keyboard, safe and sound.
- After you have removed all the keys make sure to gather them all in one place so that you don’t end up losing one of them.
The Cleaning
- To clean your keyboard keys, it is best practice to soak them in slightly warm water mixed with effervescent denture cleaning tablets or your regular dish soap for 4-6 hours.
- While your keys soak, you can get to cleaning your keyboard’s base or bezel.
- Use a soft bristle brush to brush away the dust from your keyboard’s base gently. Make sure not to brush the dust to close from the key switches or it may go inside the switches and may become impossible to remove.
- To clean stubborn grime or spilled and dried substances use a microfiber cloth that is slightly damp, but not wet. Wipe the keyboard’s base with this cloth.
- After you are done wiping with the damp cloth, follow up by wiping with a dry microfiber cloth to facilitate the drying of the bezel.
- To suck the dust out from the switches, you may as well use a handheld vacuum cleaner.
- After your keys are clean, take them out of the water and place them on a dry surface in a well-ventilated area and let them dry out completely.
The Key Replacement
- After your keys have dried, it's time to put them back.
- Refer to that mental image that you saved or the paper map of your mechanical keyboard and put all the keys back on the keyboard in the right position.
What Not to Do When Cleaning Your Mechanical Keyboard
- Please avoid using a paper towel or regular clothes for wiping. These things may leave bits and scratches on the keyboard’s base.
- Unless it is really important, try not to remove the larger keys like space, enter, and the shift key. They run at a higher risk of getting damaged on removal.
- Don’t use a gas duster to remove dust from your keyboard. Gas duster can lead to corrosion inside your keyboard. Alternatively, use a vacuum cleaner so that it sucks out dust from your device gently and effectively.

Conclusion
Getting your mechanical keyboard dirty is inevitable. However, you can avoid losing your keyboard’s efficiency, and it looks to the dirt by maintaining a proper keyboard cleaning routine.
The process of cleaning a mechanical keyboard begins with key removal. And a keyboard key remover is the best tool for removing your mechanical keyboard keys safely and efficiently. Using a keyboard key remover is as easy as ABC. It just requires a slight push and a nice pull, and the keys are out.
Many people use any flat thing they can get their hands on to remove their keyboard keys. However, by doing so, they may expose their keyboards to risk or irreparable damage. So, it is best to get a key removing tool before setting out with your keyboard cleaning ritual.
For More Information, Contact Us Today!
You May Also Read: A Complete Introduction to Keycap Puller and Its Advantages


